Sprinter Van PCV oil separator upgrade
We ran across this and wanted to share. Thanks to🧔🏼♂️Tom Clouse for the inspiration on the upgrade sharing out. We’ve added to it here.
PCV/Oil Seperator Maint and Upgrade...V1

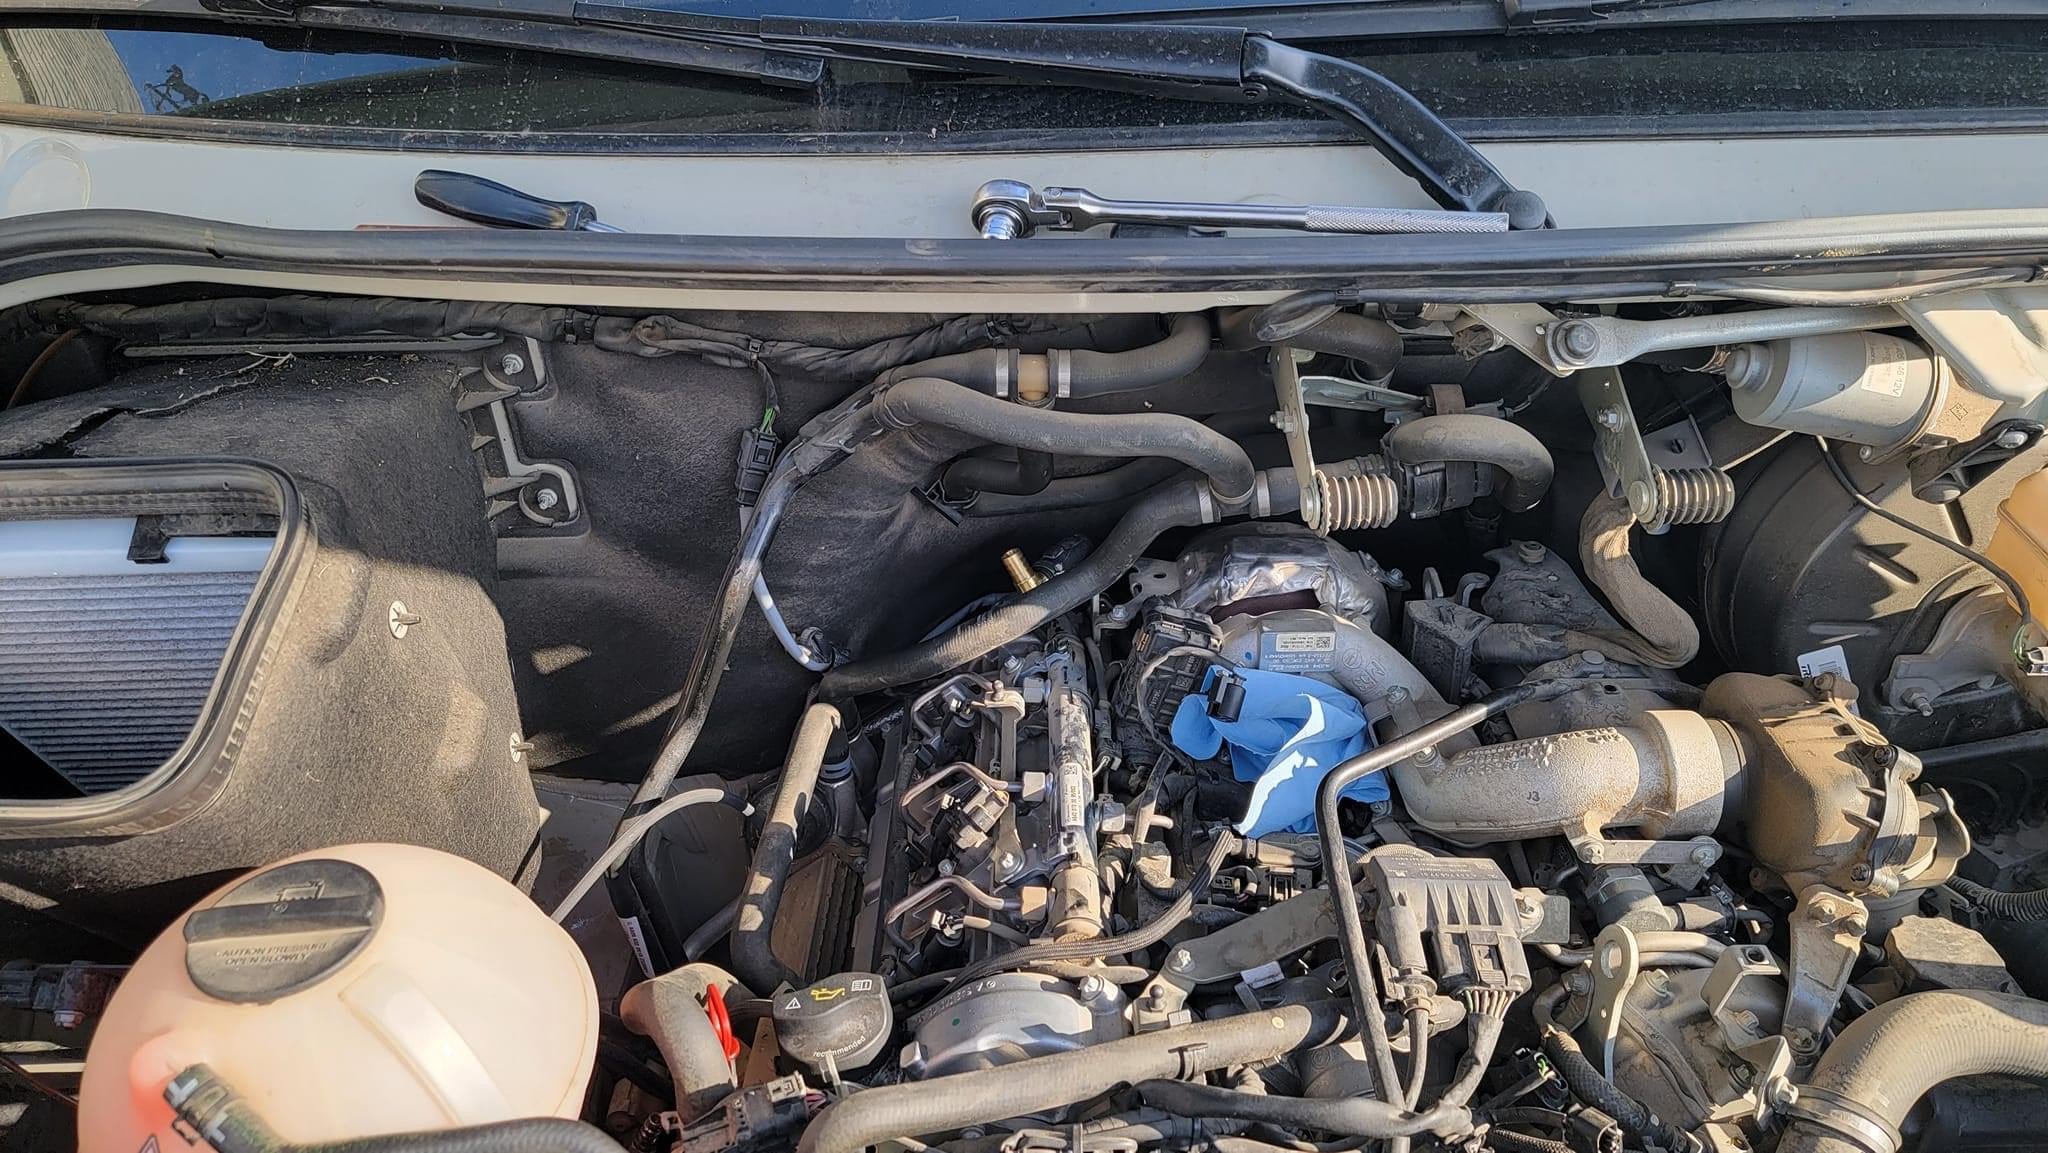
Oil slowly dripping down the intake tube
If you have noticed that the turbo resonator has a light damp coat of oil on its surface, and the lower intercooler inlet hose has some oil on it then you might find it’s time to swap out the PCV/Oil seperator with a new one!
Pictured here is a an example of the typical moisture that you might see. This drip is very subtle. If you see it dripping a lot then this might be a more urgent matter to deal with. But this is a good tell-tale sign to replace the PCV valve.
PCV Valve

NVC3 Sprinter PCV valve
The Positive Crankcase Ventilation (PCV) (Or Crankcase Vent Valve). The main role we are concerned about is its job of separating oil mist build up and keeping the excess oil out of the turbo intake, and thus out of the engine.
The PCV Valve is designed to transfer gasses from inside the crankcase to the intake manifold where they are burned as part of the normal combustion process. Excess fumes are burned by the engine, rather than released into the atmosphere, but it can fail and start passing oil into the turbo. Excess oil will eventually cause issues as the oil is sucked into the intake and will eventually result in clogging.
For 2010+ Sprinter V6
Another possible issue with a worn PCV is excessive oil consumption in the engine. It can be caused by a bad and worn out Shaft Seal of the PCV valve itself. When the seal gets worn out by the spinning camshaft, since that is where the seal goes on, the oil will be sucked out of the head bypassing the oil separator and the designed pathways of the ventilation system. A fter replacing the old PCV valve with a new one you might be lucky and fix a majority of your oil consumption.
Maintenance of the crankcase ventilation systems is a must, even if the dealer doesn’t tell you a word about it. This will prolong the life of the DPF, intake manifolds, intercooler and intercooler hoses on your van.
For NVC3 vans there are two versions of PCV. One from 2007-2009 and the one we are writing about here for a 2010+ version. The difference really is the heating element. It is a small but, very critical component, as it prevents the crankcase vapors from freezing. (water vapor is a byproduct of combustion) Oil and water emulsification forms when vapors come in contact with cooler temperatures, they freeze and the ice crystals can then easily erode the turbocharger intake blades. It does sound very strange but, it is true.
The PCV Valve has 3 components, O Ring, Shaft Seal and the internal diaphragm.
Buy it here from Mercedes Benz
It's good to keep an eye on the PCV's performance and change it out with a new one at first signs of issues.
Oil catch can/seperator add on

Moroso 85481 Air/Oil Separator Catch Can Kit
Adding was an additional oil catch can/seperator to catch/trap any trace amounts of oil that passes by the PCV can be a little extra insurance. Adding in a manual bypass valve around the catch can so you can have the option of bypassing the catch can (putting it back to stock) when weather is below freezing, this will ensure there is always a free path for the crank case vent. (Moisture in the crank case vent can cause freezing in the catch can/seperstor and block the crank case vent when below freezing).
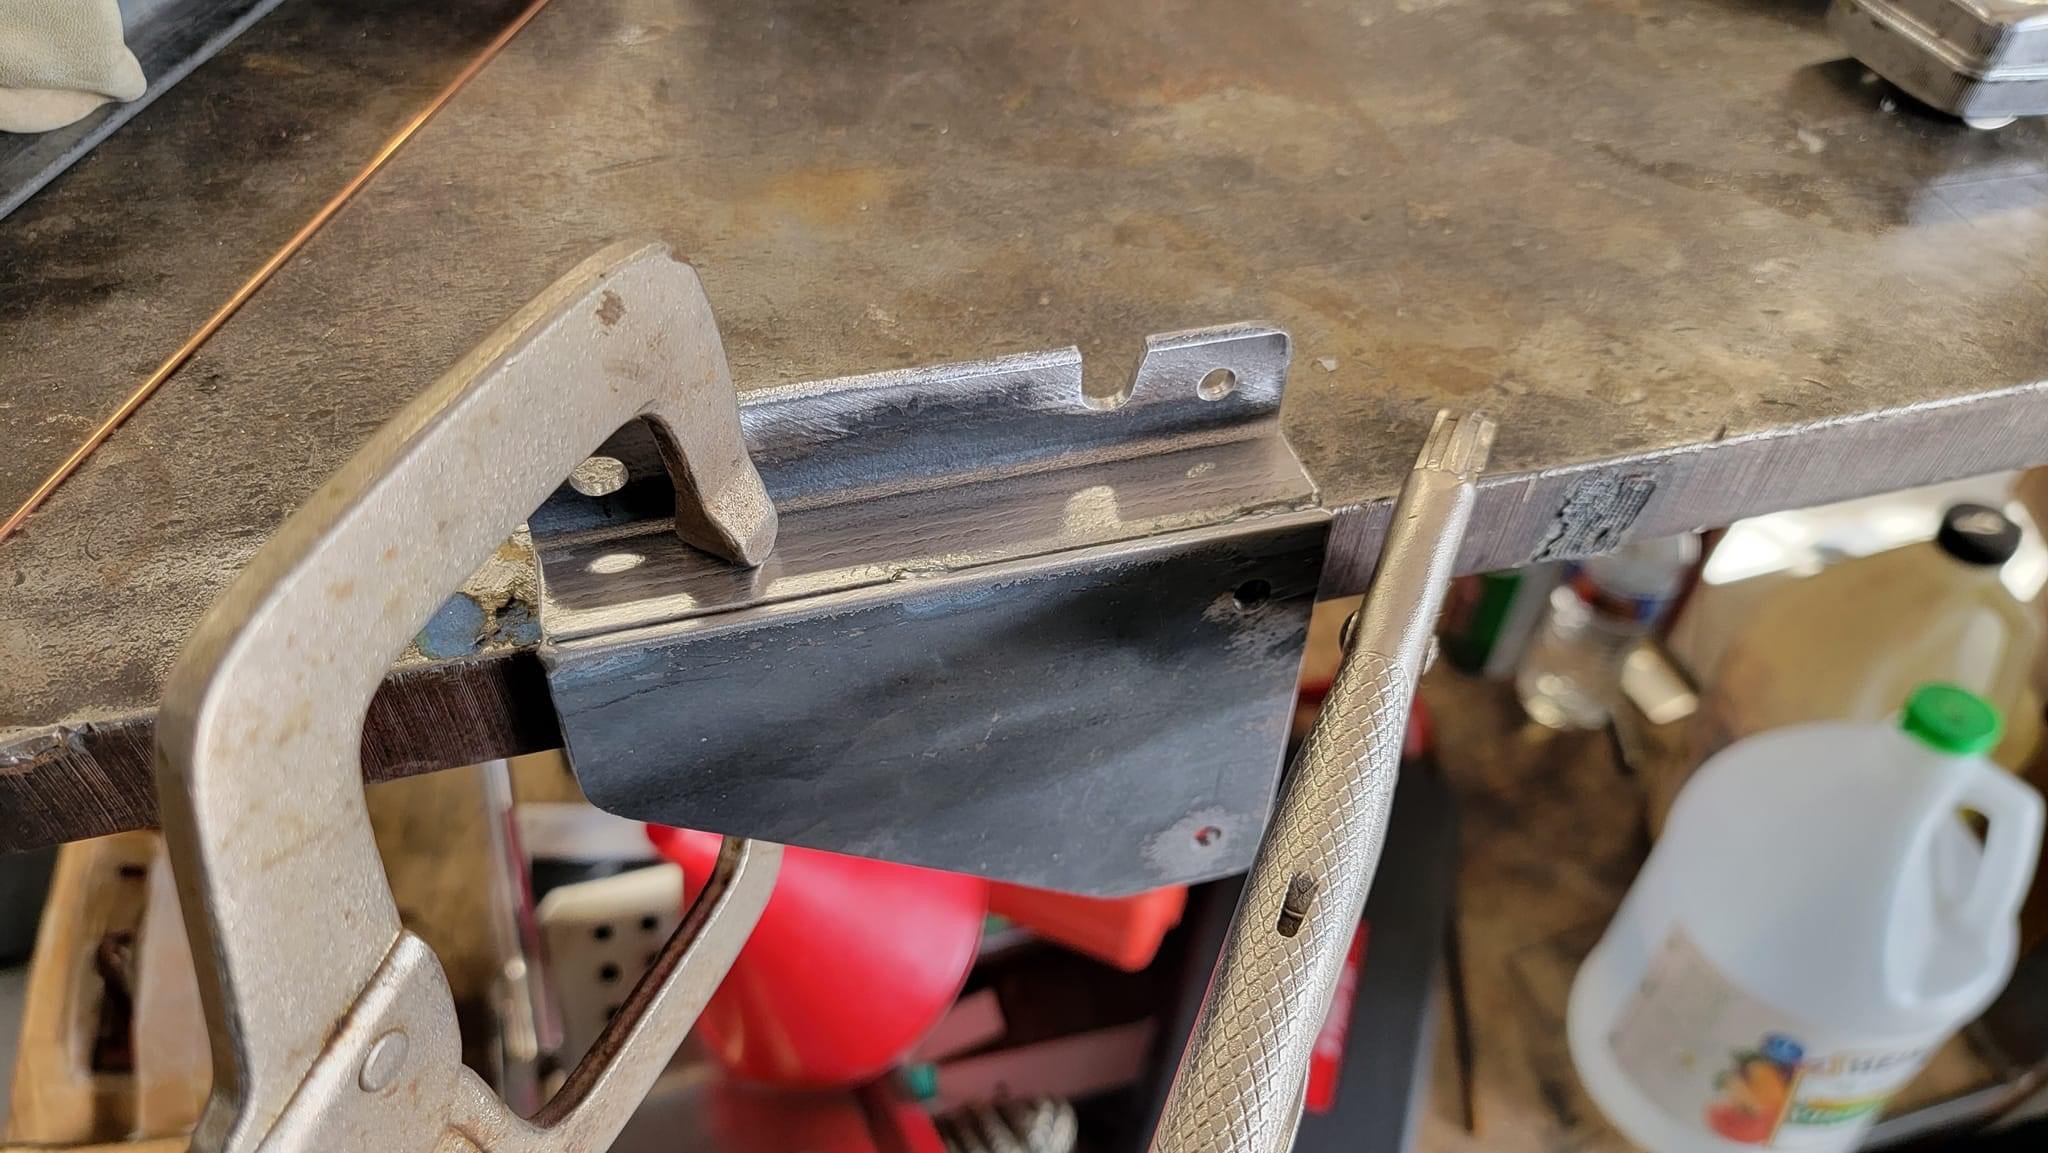
Removing the old unit and figured out where the cuts need to be. Cutting the new unit and added the new fittings. Fabricating a custom mount to hold the catch can which mounts next to the cabin air filter. Bam....oil free inlet to the turbo now 👍
Here’s an overview of the hardware used. In addition to the catch, some angle fittings and T fittings were used to route the hoses.
Cutting down the new PCV. This is always nerve racking as you likely just spent over $200 on that new PCV!. Each end gets a brass 90degree angle connector.
Sensor to a 90 degree to come up to the catch can
This is what the collector looks like mounted on the firewall with the manual valves for summer / winter settings.

Note: PCV valve failure can be caused by other engine problems. When you replace the PCV make sure the van is running well, no codes come up and no new sounds creep up.
You can eventually remove the hose clamps and replace with Oetiker clamps for a cleaner appearance.