DIY: Changing the brake light in a Sprinter Van
Changing the taillight bulb on a NVC3 Sprinter from 2007-2019 isn’t always super straight forward. There’s a few things here that will make your life easier and prevent any breakage or frustration.
What you will need.
Before you go out and take apart your taillight start here. You’ll need an appropriate replacement bulb. Identify which bulb is burned out. The left/driver side (pictured) has an extra bulb for the rear fog light at the bottom of the housing. The owner's manual states a P21W bulb for the brake light and reverse light. The running light is a smaller 5007 bulb. It’s important to not use the larger bulb in the running light space. It will fit but will be much too bright and will look like your brake lights are on. So depending on which light you have out, you’ll need to find that appropriate bulb.
Brake Light - P21W or 7506
Turn signal - 7506ATB (amber colored)
Running Light - 5007
Reversing Light - 7506 (upgrade options here)
Driver Only Rear Fog Light - 7506
Our local parts store had the 5007 but didn’t have the P21W. But we did find some likely better options that could help you. The really confusing part is that if you do an online search, you’ll find all sorts of other bulbs referenced that are NOT actually correct. So, let us save you some time and headaches from buying the wrong bulb, and returning to the store.
Our failed bulbs says it is a GE 1057 (made in Hungary) which likely were original to the vans. We have not been able to find that bulb in the US so don’t even bother.
The original 5007 bulb for the rear running tail light (made in Italy). These are easily found at your car parts store.
A good option some we’ve used with great success: a Sylvania 7506. The part that is likely the reason an internet search for a ‘Mercedes Sprinter Brake Light’ is these bulbs are typically used as ‘Running Lights’ or ‘Reverse Lights’. On the NVC3 vans, the brake light, tail light and backup light are all the same bulb. And as these bulbs are individual bulbs, they are single filament and not a dual filament bulb as some sites might recommend. With the Sylvania 7506 you’ll notice that the packaging also says that Sylvania 1073 is the same.
But what about those fancy LED bulbs? Can I upgrade my upgrade any of these bulbs to LED?
Next, you’ll need to pull out your Torx set. When doing this and a lot of other jobs on a Sprinter van you’ll need a long reach to access the Torx screws. We use a driver and bits for some projects, but this one works well with the longer reach of a T handle set. Here’s a decent one that has both Torx and Alan ball end set.
Finally, do yourself a favor and get a Plastic Trim Removal Toolset (avoid using a flat screwdriver will scratch your paint). Prying the plastic bits on your van will cause all sorts of damage. Having a set of trim removal tools will ensure you keep things looking good and also keeps your fingers from getting messed up.
Instructions
Step 1
Start by opening the rear door and swinging it all the way around to the side of the van. That gives you access to the three Torx screws you'll need to remove. This is where the long handle Torx T handle set works.
T25 Torx is the size to use here. Remove all three of the screws. This will loosen the housing. It will be now only be attached on the opposite side by 3 clips. Don’t get too carried away just yet, this is where you can easily break one of those clips.
Step 2
Close the rear door and use the trim tool to gently pry the housing out away from the van. You should be able to pop three pins out of sockets in the side of the van.
The plastic light assembly moves straight out to the side of the van if done right. It does not move easily towards the rear. Slip the trim tool between the light assembly and the body of the van, then gently pry it away. The pins are at the top, middle, and bottom of the light. It doesn't take a whole lot of force, but the pins all popped loose with a very loud sound.
The pic on the left shows that the clip didn’t pop out as it should. Not the wort thing as long as you don’t break your tail light housing.
Step 3
Disconnect the wiring
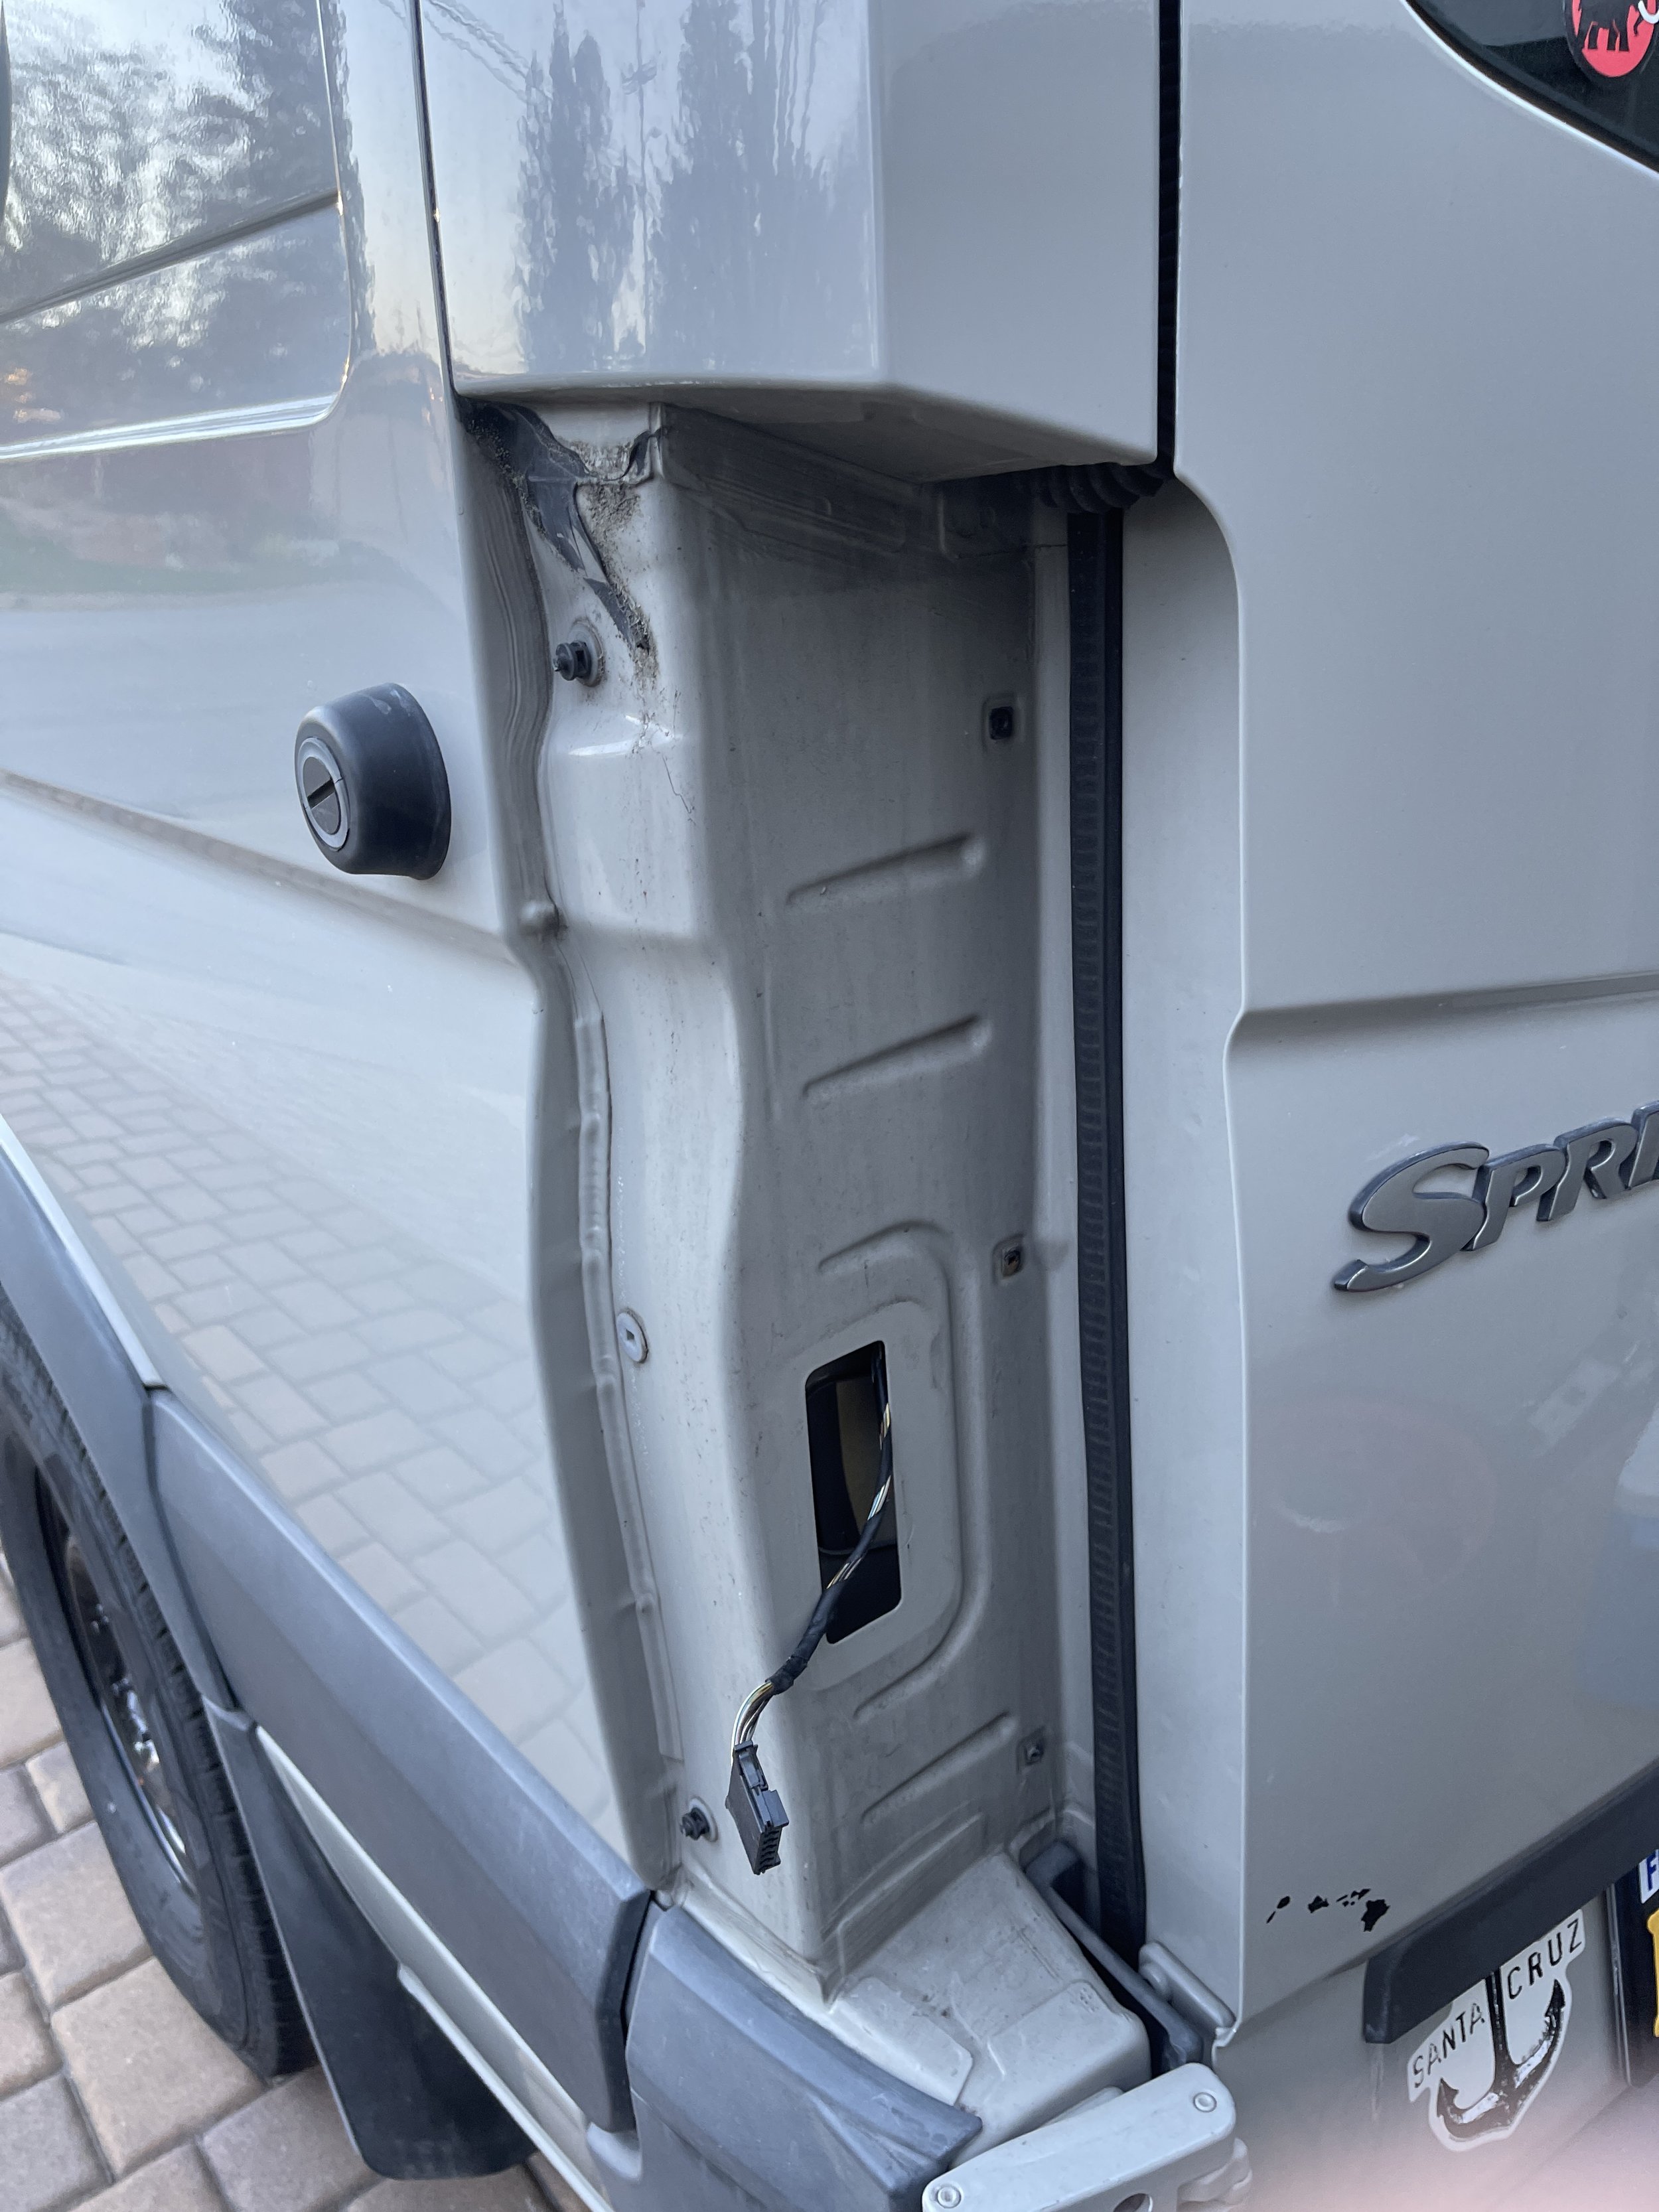
With all three pins loose, now you can get at the wiring. Squeeze the connector at the thin top and bottom edges to release the tabs, then pull the connector out. I Some might need to use a trim tool to depress the tab.
Housing removed
Now the light assembly is free of the vehicle. You can see here that only one (center) clip came out correctly. The top and bottom (black) stayed in the plastic female slot connected to the body. Take some time to clean all the dust and road grime while you have this open.
Step 4
Separate the bulb holder from the lens.
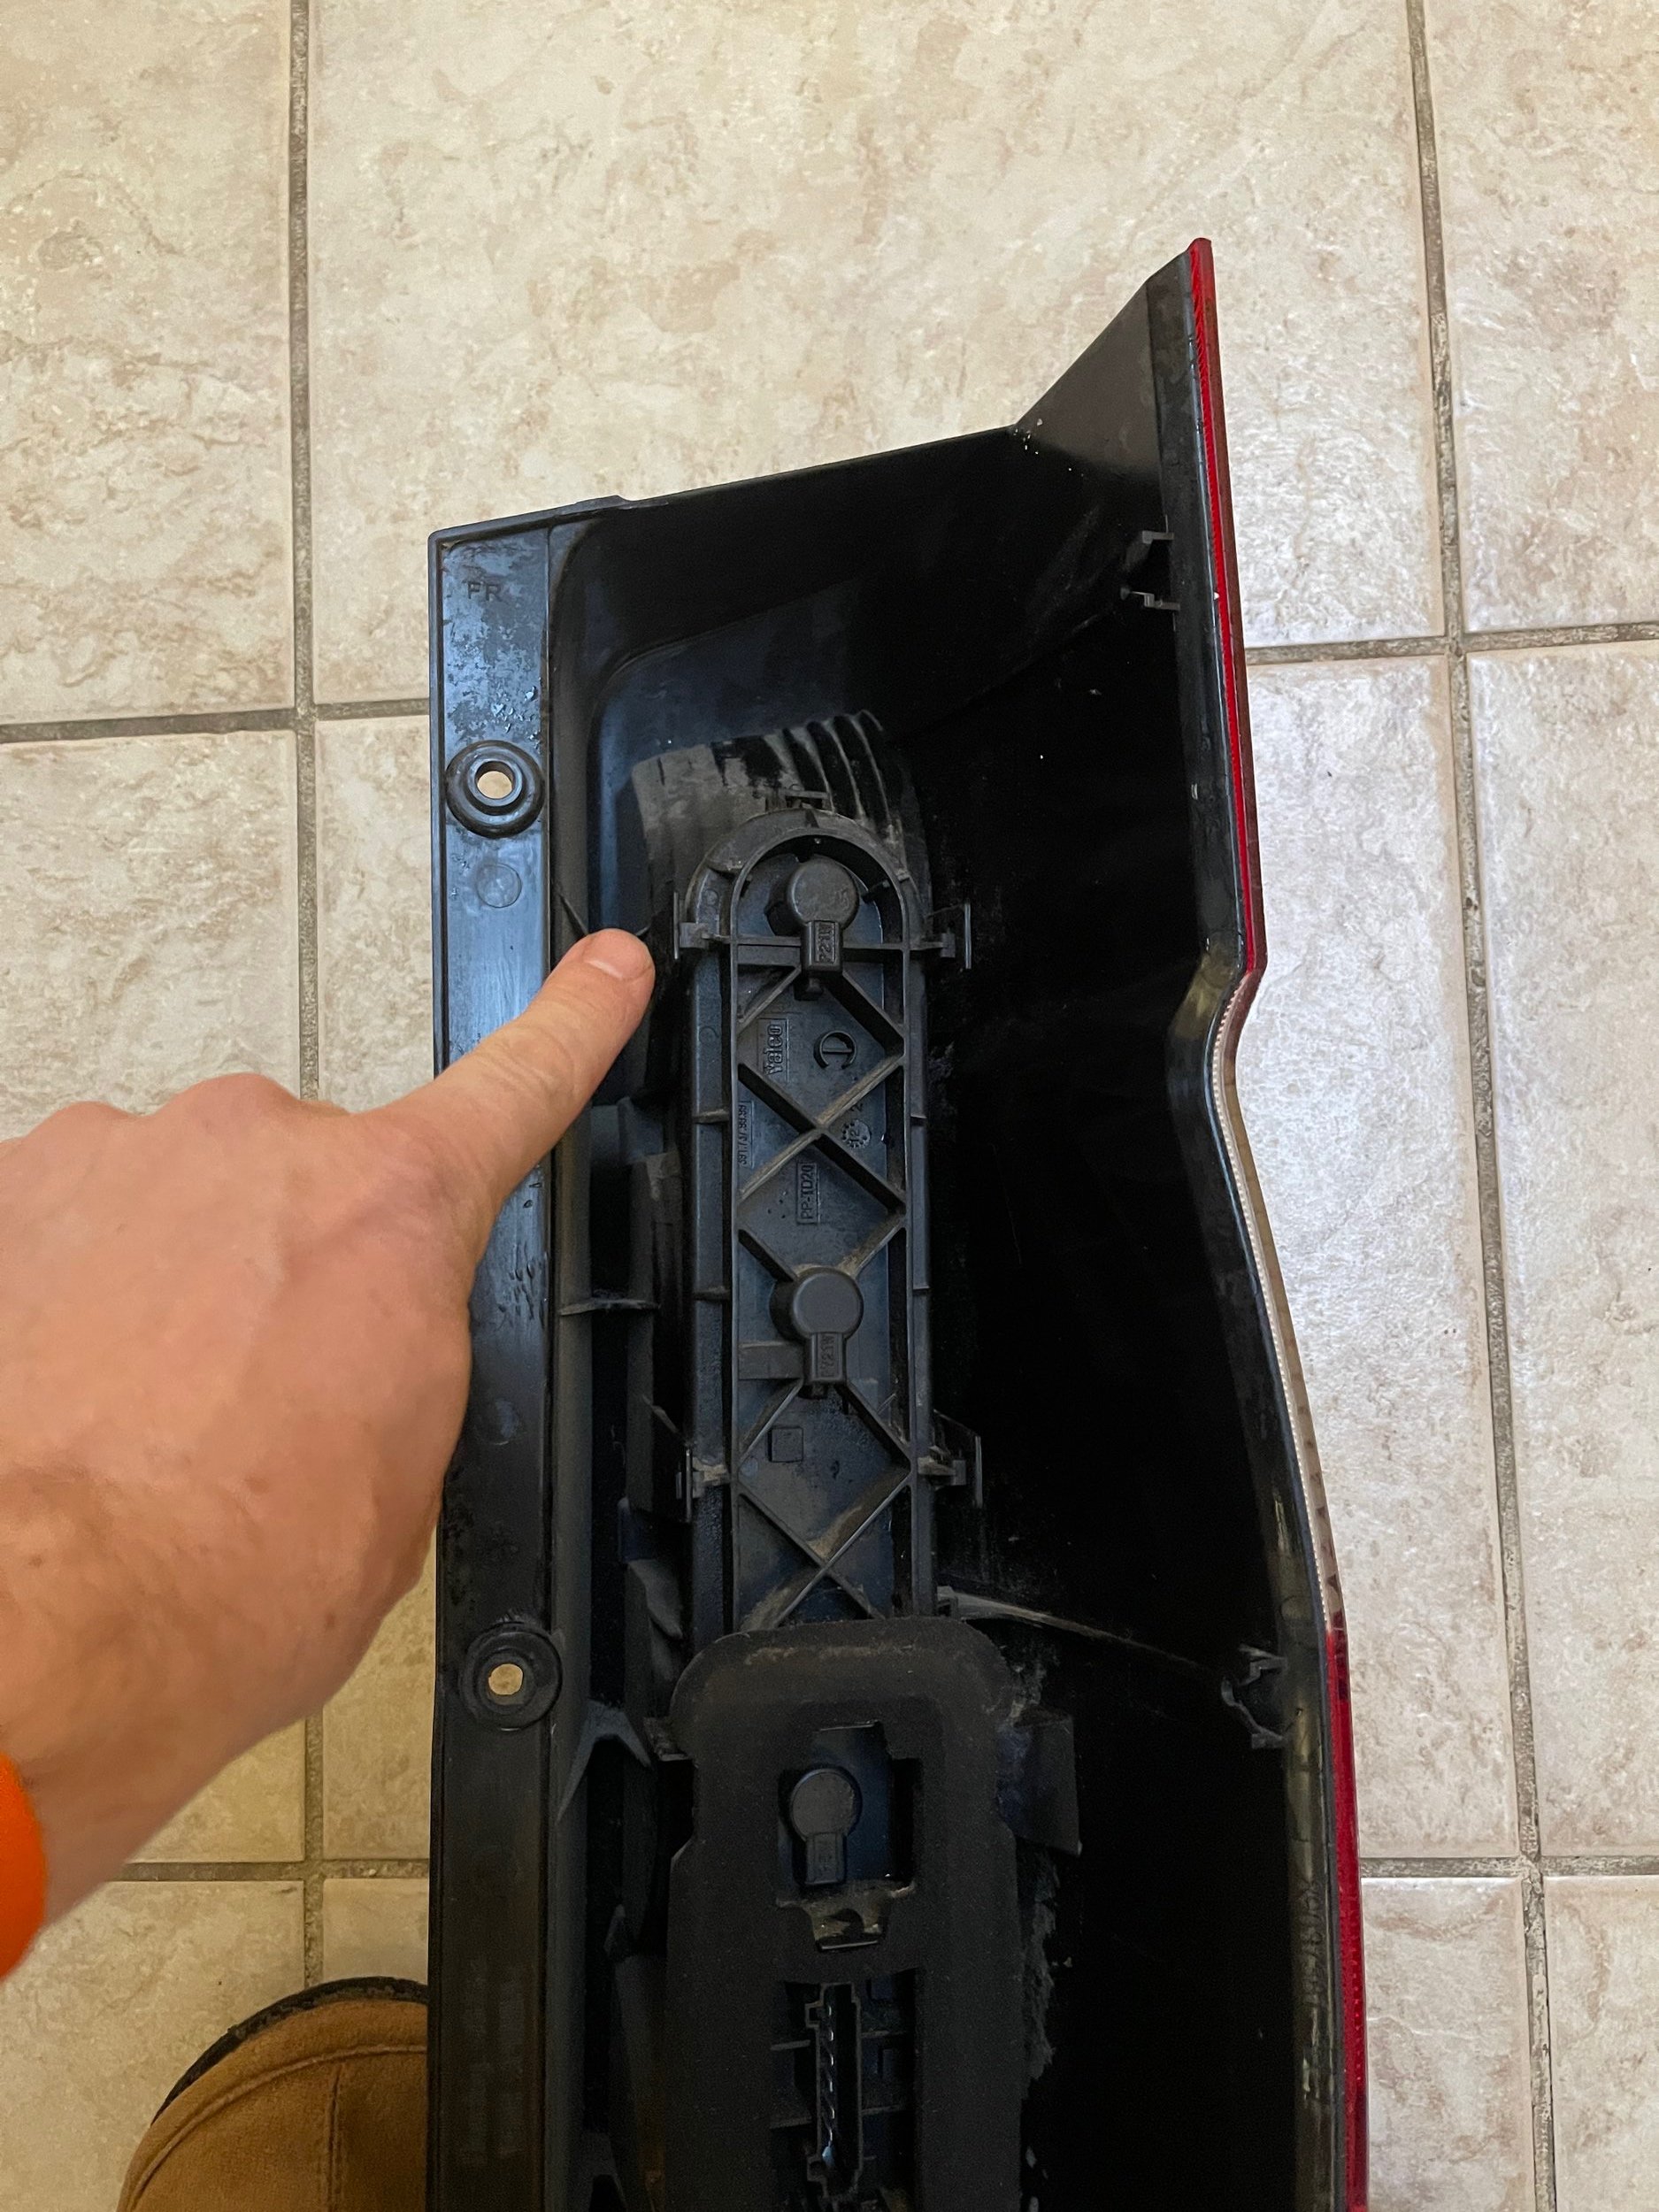
There are 7 tabs to release. The last three tabs are on the other half. Two more across from each other, and the last at the end. Press the tabs away from the center line to pop them loose, and work from one end to the other. Take your time as to not break them.
When all the tabs are loose, the light holder bar lifts easily off of the lens. As you can see, the bulbs are nothing fancy. To remove them you need to first push the bulb in and then rotate to release the bulbs. This is old school. The three clear bulbs that look alike ARE all exactly the same bulbs. This is where the Sylvania 7506 is a perfect fit. The yellow bulb is physically the same as the other three, just with an orange tint (7507).
As you have everything apart, we recommend using some clean terry cloth to clean all the dirt and grime up. Wash the inside of the lens with soapy water and let it dry before getting ready for reassembly.
Reassembly
Step 5
Once you’ve replaced the bulb in the holder bar, begin putting the housing back together and reverse everything to reassemble. Make sure you've got the light holder the right way around when putting it back on the lens. There's a locking tab on only one end of the bulb circuit so you don’t put it in upside down. We put a little bit of grease on the rubber seal before closing it up. This will keep the seal from drying out and ensure no moisture gets in. Now, press quite firmly to seat the light holder. You'll hear and see the lock tabs audibly click into place. You will be compressing a rubber gasket around the perimeter. Inspect all the tabs and move on to reconnecting the tail light housing.
There’s also a foam gasket around the wiring interface that seals the body hole from dust and moisture. We cleaned it up and put some light grease on it as well.
Step 6
Hold the light assembly near it's correct place (with the rear door closed) and connect the wiring. This is where a friend helping can come in handy. Have them hold the tail light housing and test the lights before you reinstall the housing on the van. Check that the lights are working. You'll need to turn the key on (position 2) to test the brake and reverse lights. The flasher can be checked with the emergency flasher, and turn the headlights on to check the running lights.
Step 7
If all checks out, place the housing onto the van. If you find the clips stayed in the van and didn’t stay on the tail light housing, that’s ok. We found that putting all the clips in the van first and then aligning the tail light housing to each of these keyed sections and pushing the housing with even force toward the front of the van until you hear them pop into place is fine.
You can also install the pins on the light assembly into their grommets in the body. Again, press firmly to seat the pins. Work from top to middle to bottom (or the other way around) making sure one pin is correctly seated before trying the next. Check the gap between the light and the body to see if the pin is seated. The gap should be maybe 1/8 of an inch (3 or 4 mm) and the light should be flush with the body, not sticking up proud.
Step 8
Lastly, open the rear door fully again (parallel to the side of the body) and insert the 3 torx screws. Get them all started before tightening any of them up. You may have to push on the tail light housing to get the holes to align.
And that’s it. You should be good to go.


