Replacing the front leaf spring in a Sprinter T1N
My front spring seemed tired, wasn't hard to bottom out the front. I asked on my thread how to tell if it was getting tired and the general response was that if the bump stop was less than an inch from the stop plate on the lower control arm (LCA) it may be starting to get tired. Mine was around 1/2"-5/8", I couldn't get a finger in between, so I opted for replacement.
The OEM spring can be found from Europarts SD, seemed to be the best bet and OEM quality part (I'm not affiliated with Europarts SD, but they do source generally good parts for a decent price). You also need 2 new top bushings, and a left and right bushing, so 4 total.
Another option is from General Springs who makes a set for the 2002-2006 US T1N. Transverse Spring Seat 2002-2006 This is 2 leaf set up with steel leaf springs. OEM Replacement = 9043200501 / 05175102AA
Note: This job should be done with two people, but it is possible to do as a solo job, but it’s not easy.
Here’s a diagram of the entire suspension system exploded
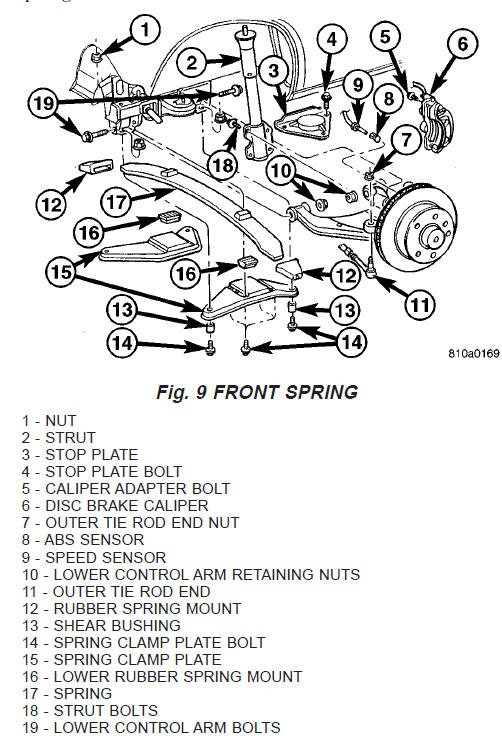
____ _____ ____ _____ _____ ____ _____ ____ _____ _____
1) WITH VAN ON THE GROUND remove the front and rear bolts from BOTH left and right spring clamp plates - you cannot get to the nuts once van is in the air!

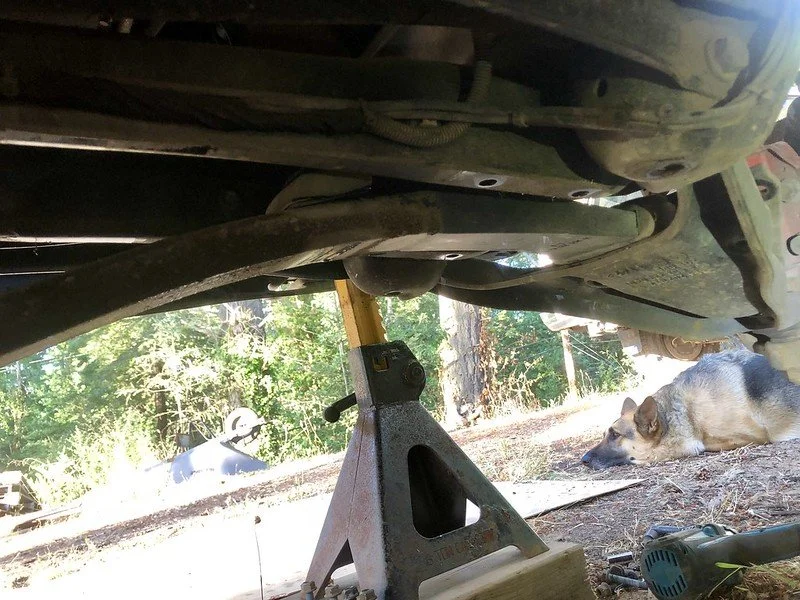
2) Jack van up and support with jackstands. Have a backup, like stack blocks of wood or something similar like use a screw jack to make extra sure you’re extra safe under there.
Remove both front wheels.
Note: This is spring is being removed from the drivers side (USA/NAFTA/NAS drivers side) and so will say when something is to be done on one or both sides.
3) Remove drivers side brake caliper adapter - not from the slide pins. 2 bolts, 18mm IIRC? Support the caliper out of the way properly and careful not to sharply bend any brake lines. it sits nicely on the little ledge behind the strut.
4) Remove ABS sensor - I used a cat's paw using many light taps and it came out easily.

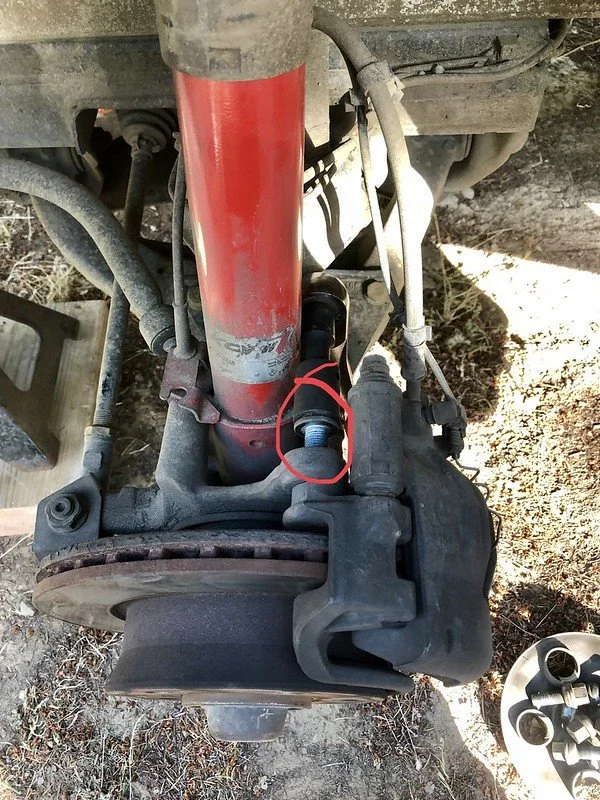
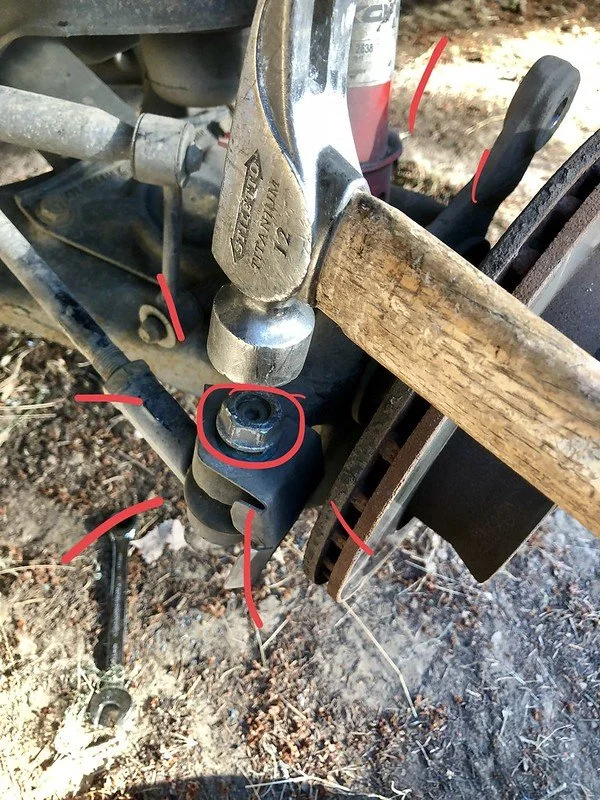
5) Separate outer tie rod end from steering knuckle. I loosened the retaining nut until the top of it cleared the tie rod's threads, then banged down on the nut (NOT the tie rod end threads!) until the tie rod broke loose. Then remove the nut and pull the tie rod all the way down and out.
6) Remove the strut. Pull back the floor mat on drivers side, I used an impact wrench with a 24mm socket to blast the nut off of the top of the strut. Then remove the 4 bolts attaching the strut to the steering knuckle.
7) Remove bolts - 3 each - from drivers and pass side stop plates. Leave the sway bar and links attached, just swing the plates out of the way.
NOTE: The manual says to remove the ball joint nuts and separate from steering knuckle but I didn't find that necessary.
8) Remove the bolts from each side of the drivers side LCA, and pull the LCA and steering knuckle assembly out of the way. IIRC the bolt is 19MM and the nut is 21MM or 7/8"? You can't reach it with a socket so you'll need the proper size wrench.
9) Support the now open end of the transverse leaf spring with a jack and put some upwards pressure on it. Next step is to remove both spring clamp plates, dr. and pass. sides.
4 - 16MM nuts and bolts on either plate.
10) Release jack and pressure will now be off of spring. BE CAREFUL and stay out of the way any time you have pressure on the spring. If something goes wrong you do not want to be in the path of that thing with tension on it! Now you can roll and remove the spring.
INSTALLATION
11) Push the new spring into the pass side LCA as snugly as you can. Make sure the rubber end is fully seated against the end of the spring. Set the new top bushings into place, a little grease may help them seat into position when you start applying pressure. They must be installed in a way that they seat into the upper color coded mounts.
NOTE: I had trouble with getting the spring seated in the center and ended up having to go back a bunch of steps because of it, and it was already like 10 at night so this is where the bulk of the swearing occurred.
12) Making sure the new spring's rubber end is snug against the LCA cup (on pass side), and top bushings are in place, begin jacking the drivers side end of the spring up, making sure you pad the jack with a piece of wood so you don't damage the new rubber end. Reinstall the drivers side spring clamp plate, making sure you use the correct new bushing on the drivers side! Working from bolt to bolt, never fully cranking one down. There are two guides on the front and back-most bolt holes that must line up (the holes that you can only access the nuts to while van is on ground). Swear a bunch. Get it good enough, it may not be all the way tight yet, that's ok.
13) With drivers side spring clamp plate at least mostly tightened down, you can reinstall the LCA. Release jack, setting spring tension down onto the spring clamp plate. Here is where I switched to a screw jack underneath the LCA to help push things into place, and be able to line up the LCA into its holes. I also dabbed some grease onto the LCA bushings to help them slide around a little better. Once installed don't tighten all the way, you can do a final LCA tightening with van on ground.

14) Reinstall the Pass. side spring clamp plate, again making sure you have the correct bushing on top of the plate, working from bolt to bolt and lining up the guides.
15) Reinstall the stop plates, dr. and pass. sides.
16) Reinstall dr. side tie rod end.
17) Reinstall strut.
18) Reinstall ABS sensor. Push it back into the hole until it gently makes contact with the tone ring. As soon as it touches its good, they self adjust for the correct gap when you drive.
19) Reinstall brake caliper.
20) Reinstall wheels, and lower van to the ground. Now you can reinstall the front and rear bolts and nuts onto the spring clamp plates, both pass. and dr. sides. Then make sure the 4 16MM bolts and nuts are torqued to spec.

21) Give a final torque to spec for the LCA bolts. 150N-m (110 ft. lbs.)
That's it.
Images by Nicholas Tavasieff, on Flickr
Inspired by a Zundfolge on Sprinter Source - Write Up
Finally a writeup that helped some, but I honestly had trouble reading it and found it more useful to read the service manual instead: Here’s a good source from The Mercedes Gen In