Finding the Right Places to Ground Your Wiring on a Sprinter Van
When adding electrical accessories to a Mercedes Sprinter van — lights, compressors, inverters, refrigerators, diesel heaters, air compressors, radios, Starlink, or full camper electrical systems — one of the most overlooked parts of the install is grounding.
⚡ Power gets all the attention. Grounding gets ignored.
But poor grounds are one of the biggest causes of electrical gremlins in Sprinter builds: flickering lights, intermittent electronics, voltage drops, CAN bus issues, strange sensor behavior, battery charging inconsistencies, and unexplained failures.
The reality is simple:
A bad ground can make a perfect install behave like a broken one.
This guide covers where to properly ground wiring on a Mercedes Sprinter van, what to avoid, and how to create reliable, low-resistance grounding points that won’t leave you troubleshooting later.
Disclaimer: This blog is a place where I share personal opinions, experiences, technical observations, and lessons learned from working on and driving these vehicles. Unless explicitly stated and referenced, nothing here should be interpreted as official manufacturer guidance, engineering recommendations, or OEM-approved procedures.
Vehicles evolve, aftermarket parts vary, and every setup is different. Always consult factory service information and qualified professionals before performing modifications, repairs, or maintenance.
Understanding Grounding on a Sprinter
Unlike older vehicles where almost everything could simply be screwed into sheet metal, modern Mercedes Sprinters are electronically complex. The chassis acts as the common negative return path for the electrical system, but not all metal is an equal ground. This is important!
Just because something is metal does not mean it makes a good grounding location. Paint, seam sealers, adhesives, corrosion protection, aluminum components, isolated brackets, and spot-welded panels can all introduce resistance. And resistance creates problems.
For high-quality electrical work, think of grounding as part of the circuit design — not an afterthought.
The Best Places to Ground Wiring on a Mercedes Sprinter
1. Factory Ground Studs (Preferred)
Mercedes already engineered grounding points throughout the van. These are almost always the best places to start.
Factory grounding studs are welded directly to the body and designed specifically for electrical return paths.
Under the driver seat pedestal
Under the passenger seat pedestal
Near the starter battery (shown to the left)
Rear cargo area sidewalls
B-pillars and D-pillars depending on wheelbase and trim
Near OEM wiring harness routes
You’ll usually recognize them as threaded studs with multiple brown factory ground wires attached. In Mercedes wiring, brown almost always indicates ground.
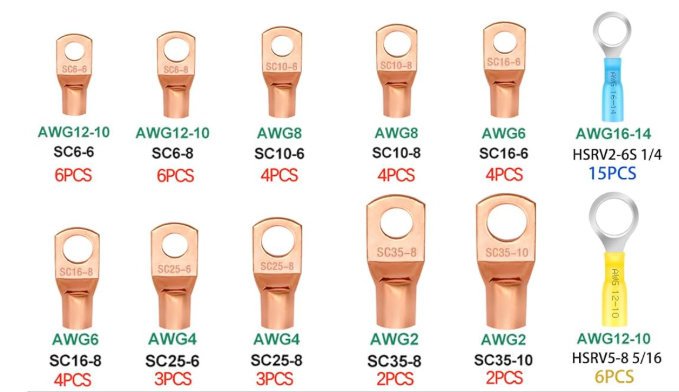
Various size for various guage of wires.
If Mercedes trusted it for critical vehicle systems, it’s probably a good place for your accessory ground. These are all M6 connections are when utilizing them for grounding, use the correct connector for optimal connection and make sure to tighten them to a torque of 6Nm [4.4lbs-ft]
Here’s a decent all-copper connector kit for your wiring, make sure to always use the appropriate size of cable for your length and power needs: Buy it Here →
Why factory ground points are best:
Engineered for proper conductivity
Already bonded to chassis ground
Corrosion-resistant locations
Known low-resistance paths
Minimize electrical noise and instability
Tip: If you’re adding multiple accessories, avoid stacking ten ring terminals onto one factory stud. Use a proper fused negative bus bar connected to a known chassis ground. Read our post on tapping into the bus bar here →
2. Seat Base Grounding (One of the Best Locations)
For Sprinter Vans specifically and overland builds, the seat pedestal area is often the electrical heart of the van. If your auxiliary batteries, DC-to-DC charger, inverter, or fuse panels are under the seat, grounding here makes a lot of sense. Check out where we mounted the Renogy 12V 50A DC to DC charger with MPPT
Mercedes typically provides excellent grounding points inside the seat base. They are also very very close to the battery and the negative power disconnect found in the center post: See here →
The metal structure there is super robust and directly tied into the chassis.
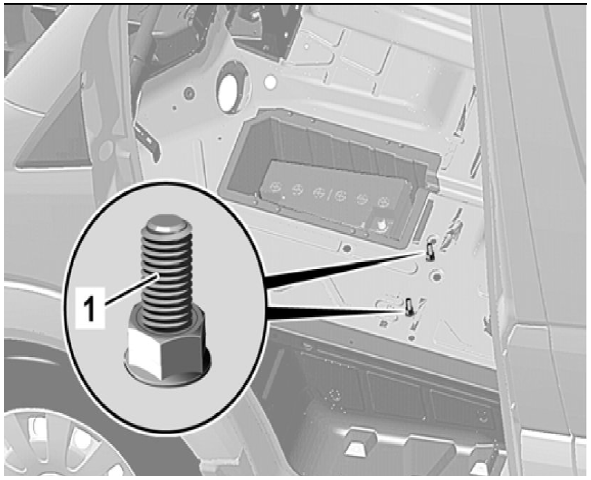
Sprinter: Driver floor
This makes it an ideal location for:
For larger power systems, always size grounding cables appropriately. Your negative cable should generally match the gauge of your positive cable.
A 2/0 inverter cable should not return through a tiny chassis ground.
Dedicated Chassis Grounding Studs
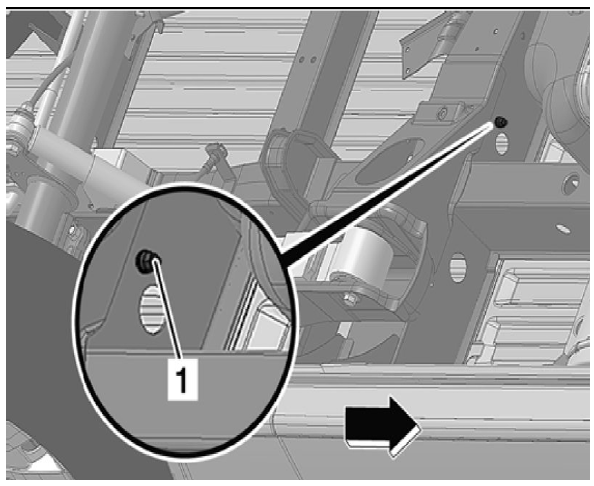
Sprinter: Rear Undercarriage Frame
For high-current accessories like:
Secondary battery systems
High-power DC charging
It’s often worth creating a dedicated grounding strategy.
Instead of relying on thin factory sheet metal paths, connect directly to a substantial chassis grounding point or bonded frame section.
On 4x4 and AWD Sprinters especially, ensure the chassis and body bonding straps are healthy and corrosion-free.
Electrical resistance across bonded sections can create unexpected voltage drop.
How to Create a Proper Ground (If You Must Add One)
Sometimes there simply isn’t a convenient factory location. If you need to add a grounding point:
Step 1: Choose structural metal
Find thick body metal or reinforced steel.
Avoid flimsy sheet metal.
Avoid removable brackets.
Avoid painted trim support structures.
Step 2: Remove paint completely
Paint is an insulator. This is one of the most common mistakes people make. Use a sanding disc or abrasive wheel and expose bare metal around the mounting area.
No paint.
No primer.
No seam sealer.
Bare metal only!!!
Step 3: Use the correct hardware
A good grounding stack-up looks like this:
Bolt → star washer → ring terminal → bare chassis metal → washer → lock nut
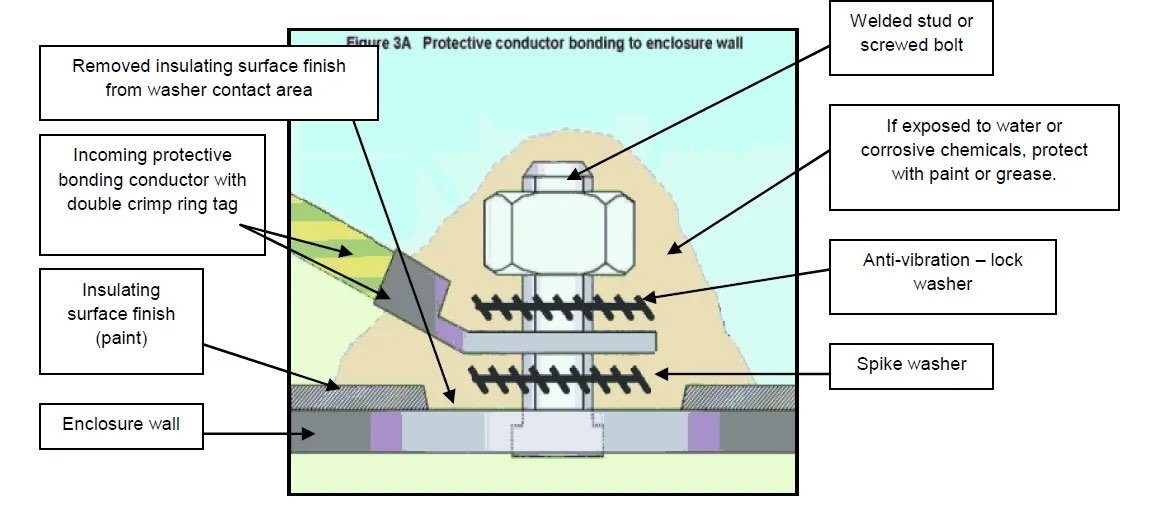
Star washers matter because they bite into the metal and maintain contact over time.
Crimped ring terminals should be marine-grade when possible.
Cheap auto parts terminals are often the weak point.
Step 4: Protect against corrosion
After installation protect your nuts! Or studs… or… just protect them.

Apply dielectric grease Dielectric grease offers superior insulation properties, which can effectively prevent short circuits, and arcing in electrical connectors. Dielectric grease is essential for maintaining the optimal performance of electrical connectors. It’s also waterproof & anti-corrosive protection designed to protect electrical connections from dust, moisture, and other contaminants, keeping components insulated and preventing metal corrosion.

Use battery terminal protectant spray.
Paint around (not under) the connection if exposed to moisture. If on the underside we use rubberized undercarriage chassis paint.
Bare metal is good for conductivity. Bare metal exposed to weather is bad for longevity. Just remember, rust never sleeps!

We’ve also found this BTAS all-in-one contact silicone dielectric grease that also waterproofs, lubricates and seals to be a good cary all for if you need to fix something on the go. But to do it right and prevent rust from forming on the exposed metal we recommend using the protectant spray.
Grounding Mistakes to Avoid
Grounding to random bolts
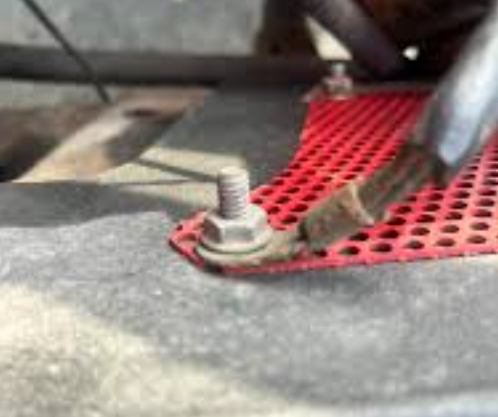
Not every bolt touches grounded metal.
Seat bolts, trim brackets, body panels, and painted fasteners may not provide a reliable return path.
Always verify continuity.
Self-tapping screws into sheet metal
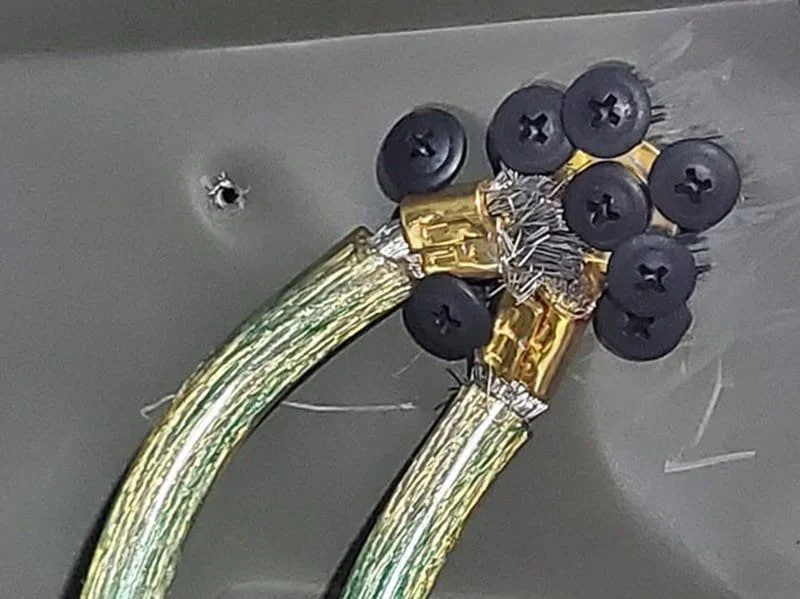
This works — until it doesn’t.
Vibration loosens them.
Corrosion builds.
Resistance increases.
Intermittent electrical issues follow.
Avoid this whenever possible.
Mixing high-current and sensitive electronics
Putting noisy electrical devices (compressors, inverters, motors) on the same poor grounding path as sensitive electronics can create weird behavior.
Noise and voltage fluctuations can affect radios, lighting dimmers, control modules, and communication systems.
Undersized ground wires
Ground cables are not optional shortcuts.
The return path matters just as much as power delivery.
Match cable sizing appropriately.
Test Your Ground — Don’t Guess
Before buttoning up panels, test your work. Use a multimeter and check:
Continuity Test
Measure resistance between your ground point and the battery negative terminal.
You want extremely low resistance.
Ideally close to 0 ohms.
Voltage Drop Test
With the accessory operating under load, measure voltage between:
Ground point → battery negative
You should see minimal voltage drop.
If you’re seeing meaningful voltage loss, your grounding path is inadequate.
The Goal: OEM-Level Reliability
A clean Sprinter electrical install isn’t just about making something work. It’s about making it work five years from now, in heat, cold, vibration, dust, and thousands of miles from home. The difference between a professional-quality van electric install and a frustrating one often comes down to details nobody sees. Grounding is one of those details. Spend the extra time to find a proper grounding location, use quality hardware, and verify the connection. Your future self — stranded somewhere in the desert troubleshooting electrical issues — will thank you.
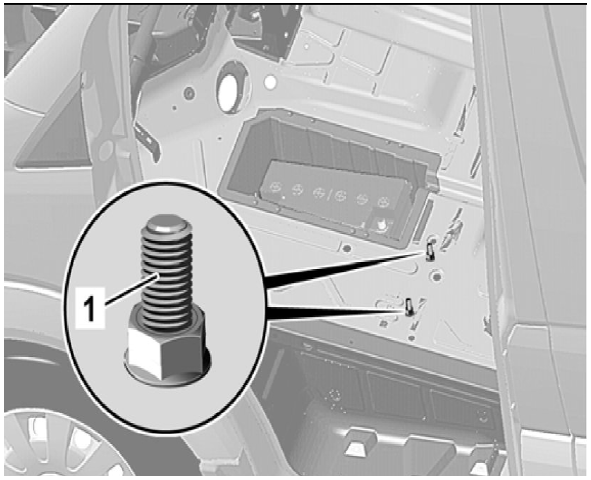


So you want to add something in your van but you need a 12V power source from your battery. The trouble is the battery for the Sprinter Van is locked away in a box underneath the floor right beneath the drivers feet.